


How to Make Your Own Dairy Products at Home: Cheese, Yogurt, Butter
Making dairy products at home is a rewarding craft that not only saves money but also offers healthier and fresher alternatives to store-bought versions. Did you know homemade cheese, yogurt, and butter can be tailored to your taste preferences and dietary needs? This guide covers the essentials of crafting these staple items in your kitchen, detailing the ingredients and steps required for successful results. Dive into the world of home-made dairy and discover how simple processes can turn basic ingredients into savory, creamy goodness. Whether you’re health-conscious or a DIY enthusiast, creating your own dairy delights taps into a sense of accomplishment and culinary creativity.
Introduction to Homemade Dairy Products
Dairy products crafted at home offer more than just the satisfaction of creation. They open a world of fresh flavors and nourishing ingredients. This section will explore the joys and benefits of making your own dairy. We’ll also delve into the essential ingredients and tools you’ll need to get started. Dive in and discover how to bring a personal touch to your dairy creations.
Benefits of Making Dairy Products at Home
Creating dairy products at home provides numerous benefits. First, it allows complete control over ingredients. You can choose organic, non-GMO, or locally sourced milk, ensuring high-quality and healthy results. This control extends to flavorings and additives, giving you the opportunity to avoid preservatives and artificial ingredients.
Homemade dairy can also be more cost-effective. While there’s an initial investment in equipment, over time, the savings add up. Making items like cheese, yogurt, and butter yourself often proves cheaper than buying premium store brands.
There’s also the pleasure of customization. Create unique flavors tailored to your taste. From herb-infused cheese to honey-sweetened yogurt, the possibilities are endless. Plus, crafting your own dairy products connects you with the traditional methods and offers a rewarding, hands-on experience.
Finally, homemade dairy is fresher. There’s nothing like the taste of fresh yogurt or cheese, just hours old. This freshness translates to better taste and nutritional content, as many nutrients degrade over time in store-bought products.
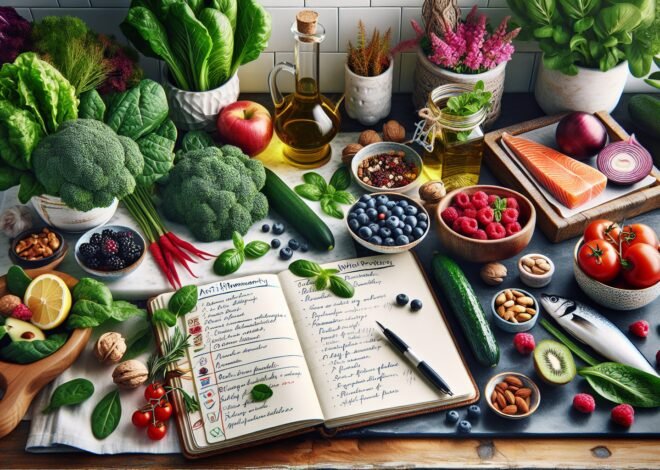
Beginner’s Guide to Essential Dairy-Making Ingredients
Starting your journey into homemade dairy requires understanding the essentials. The primary ingredient is, of course, milk. Fresh, whole milk from a reliable source gives the best results. Opt for cow’s, goat’s, or sheep’s milk based on your preference and intended outcome.
For cheese-making, key ingredients include rennet and cultures. Rennet is an enzyme that helps coagulate the milk, forming curds. It’s available in liquid, powder, or tablet form. Cheese cultures, on the other hand, add flavor and texture. These bacterial cultures come in specific strains tailored to different cheese types.
Salt is another critical ingredient. It enhances flavor and acts as a preservative, preventing spoilage. Use non-iodized salt for the best results.
For yogurt, you need a starter culture, which can be a small amount of existing yogurt. This culture introduces the necessary bacteria to ferment the milk.
Butter requires only heavy cream and an optional pinch of salt. The quality of cream directly impacts the butter’s flavor, so choose wisely.
Tools and Equipment for Homemade Dairy Products
Equipping your kitchen with the right tools simplifies the dairy-making process. Start with a large, stainless steel pot. It should be heavy-bottomed to ensure even heat distribution and prevent scorching.
A cheese thermometer is a must-have. Precise temperature control is crucial, especially in cheese-making, affecting the texture and flavor.
Cheesecloth or butter muslin is essential for draining whey from the curds. A finer weave muslin is preferable for softer cheeses.
Invest in a set of molds for shaping your cheese. Different shapes and sizes cater to various cheese types. A cheese press is necessary for making hard cheeses, applying even pressure to form and age them correctly.
A butter churn or a stand mixer with a whisk attachment makes butter production more efficient. Meanwhile, yogurt incubators maintain the steady temperatures necessary for fermentation, though a simple warm spot in your kitchen can suffice.
Consider buying a pH meter for advanced cheese and yogurt making. It helps ensure your dairy products reach the right acidity, a key factor in taste and safety.
Step-by-Step Guide to Making Homemade Cheese
Cheese-making at home can seem daunting, but breaking it down step-by-step makes it accessible. This section guides you through crafting both soft and hard cheeses. We’ll also cover solutions to common issues, ensuring a smooth cheese-making experience.
How to Make Soft Cheese at Home
Soft cheese is a great starting point for beginners. Start by heating fresh milk to the required temperature, usually around 86°F (30°C). Add a cheese culture to initiate fermentation, then let it sit for about an hour.
Introduce rennet to coagulate the milk, forming curds. Once the curds set, cut them into small cubes to release whey. Stir gently to prevent breaking the curds.
Next, heat the curds over low heat, stirring occasionally. This step affects the cheese’s texture, so monitor closely. Once desired firmness is achieved, drain the whey using a cheesecloth. Hang the curds to allow excess whey to drip off.
Season with salt and herbs, if desired, and let the cheese firm up in the refrigerator. After a few hours, your soft cheese is ready to enjoy.
Homemade Hard Cheese: A Detailed Process
Hard cheese requires more time and patience but rewards with rich, mature flavors. Begin by heating milk to the appropriate temperature, generally around 90°F (32°C). Add the starter culture and let it ripen for about an hour.
After ripening, add rennet and let the milk set until firm. Cut the curds into small pieces, then stir and heat them slowly. This process, known as “cooking the curds,” releases more whey and affects the cheese’s texture.
Once the curds reach the desired texture, drain them using a cheesecloth. Place the curds into a mold, applying pressure with a cheese press. Press for several hours to remove excess whey and form the cheese.
After pressing, soak the cheese in a brine solution for flavor and preservation. The final step is aging. Store the cheese in a cool, humid environment for several weeks or months, allowing flavors to develop.
Troubleshooting Common Cheese-Making Issues
Even experienced cheese makers encounter challenges. If your cheese isn’t setting, it could be due to insufficient rennet or low milk quality. Ensure your rennet is fresh and accurately measured.
A bitter taste might result from over-aging or incorrect bacterial cultures. Adjust aging times and verify culture strains to prevent bitterness.
If the cheese is too soft, it may not have cooked the curds long enough. Extend the cooking time and check temperatures to achieve the desired firmness.
Mold growth on cheese can be controlled by ensuring proper sanitation and storage conditions. Wipe the cheese with a vinegar solution to remove unwanted mold.
When troubleshooting, patience and practice are key. Keep notes on each batch to hone your techniques and achieve the perfect cheese.
Crafting Your Own Yogurt and Butter
Creating yogurt and butter at home is both rewarding and surprisingly simple. This section will guide you through the processes, from choosing ingredients to flavoring and storage. Embrace the art of homemade dairy and indulge in delicious, fresh products.
Simple Process for Homemade Yogurt
Making yogurt at home involves a few straightforward steps. Begin by heating milk to around 180°F (82°C) to kill any unwanted bacteria. Allow it to cool to about 110°F (43°C) before adding the starter culture.
Mix a small amount of existing yogurt into the cooled milk, stirring well to distribute the cultures evenly. Pour the mixture into jars and keep them in a warm place to ferment. This can be a yogurt maker or simply an insulated cooler.
Fermentation takes about 6 to 12 hours, depending on your taste preference. Longer fermentation results in tangier yogurt. Once done, refrigerate the yogurt to set and enhance the flavor.
Homemade yogurt can be customized with fruits, honey, or granola. Its creamy texture and fresh taste make it a delightful addition to breakfast or snacks.
Creating Delicious Homemade Butter
Butter-making is an engaging process with rich rewards. Start with heavy cream at room temperature. Pour it into a stand mixer or butter churn and beat at medium speed.
As the cream thickens, it will eventually separate into butter and buttermilk. This transformation is magical to watch. Once separated, drain the buttermilk and rinse the butter under cold water to remove any remaining buttermilk.
Knead the butter to remove excess water and add a pinch of salt for flavor if desired. You can also incorporate herbs or spices for a personalized touch.
Shape the butter using molds or roll into logs for easy slicing. Store in the refrigerator for daily use, or freeze for longer preservation.
Flavoring and Storing Homemade Dairy Products
Enhancing your dairy products with flavors elevates the homemade experience. Add herbs like chives or rosemary to cheese, or mix berries and honey into yogurt. The variety of flavors you can create is endless.
Storage affects flavor and longevity. Keep dairy products in airtight containers to maintain freshness. Cheese should be wrapped in wax paper or cheese paper to allow it to breathe while protecting it.
For yogurt, use sealed containers to prevent spoilage and contamination. Butter can be stored in a butter dish on the counter for short-term use or wrapped in parchment paper and kept in the fridge.
With these tips, your homemade dairy will retain its deliciousness, ready to be savored with each bite.
Conclusion
Making dairy products at home can be rewarding and cost-effective. Essential ingredients and equipment include fresh milk, cheesecloth, a thermometer, and active cultures like yogurt or buttermilk. Following precise instructions for temperature and timing is crucial to achieve desired consistency and flavor. Popular homemade dairy products include yogurt, cheese, and butter. Understanding basic principles of fermentation and curd formation is key to successful preparation.
FAQ
How can I make homemade cheese from scratch?
Begin by heating milk until it’s warm, then add rennet and allow the mixture to set. Once curds form, cut them with a knife and cook gently until they firm up. Drain the whey, and your cheese is ready to shape and age if desired.
What ingredients are needed for making yogurt at home?
You will need fresh milk and a starter culture, which could be a small amount of store-bought yogurt with live cultures. Heat the milk, let it cool, mix in the starter, and let it ferment in a warm spot until set.
What is the easiest way to churn homemade butter?
The simplest method involves using heavy cream. Pour it into a jar, seal tightly, and shake vigorously until butter forms. Drain the buttermilk, rinse the butter under cold water, and enjoy.
How can I ensure my home-fermented dairy products are safe to eat?
Use clean equipment and fresh ingredients. Maintain appropriate temperatures during fermentation. Properly storing your products in the refrigerator helps maintain safety. Always trust your senses; if it looks or smells off, discard it.
What equipment do I need for making dairy products at home?
Basic tools include a large pot, thermometer, cheesecloth, and jars. A whisk, ladle, and a colander may also come in handy depending on the product you’re making.
Can I make lactose-free dairy products at home?
Yes, you can use lactose-free milk as a base for products like yogurt and cheese. Adding lactase enzyme drops to regular milk before making your dairy products can also help break down lactose.